Creating an oasis just got simpler; discover how to build a backyard putting green effortlessly. A personal putting area can elevate your at-home golf practice and bring fun to family gatherings.
As you plan your project, consider factors such as space, turf quality, and ongoing maintenance. By exploring a few practical guidelines, you’ll be on your way to creating a stand-out green right in your backyard.
Contents
Selecting Space and Layout
Deciding where to place your putting zone is the first key step in this process. Try to find a flat area with enough square footage for a comfortable swing and a variety of shots. Natural slopes can add extra difficulty, but you’ll want to avoid ground that’s too uneven or prone to collecting water.
If possible, position the green in a spot that receives a good amount of sunlight, because grass and certain turf materials thrive with regular exposure to light.
Spend some time walking around your yard to assess possible hazards and how each area might serve your golfing needs. Give thought to neighboring trees and shrubs, especially because their roots could interfere with your base material. Ensure you won’t slice into fences or other obstacles that can limit your swing. Once you’re happy with the location, mark the outline with landscape paint or rope so you have a clear visual of your intended design.
Materials for Backyard Putting Greens
Your material choices will vary based on your budget, climate, and maintenance goals. Many homeowners start with a base layer of crushed stone or gravel on top of compacted soil to achieve a stable foundation.
Artificial turf stands out as a low-maintenance option, and you can also explore DIY backyard putting green kits if you’re looking for a pre-packaged solution. Synthetic grass made specifically for golf has dense fibers and helps mimic real putting conditions.
When selecting turf, look for products labeled as the best turf for backyard golf greens, as these varieties provide a realistic roll and consistent speed. Some people opt for natural grass, though this usually demands more upkeep, irrigation, and fertilizer.
If your time is limited, synthetic options might offer a better return on investment. No matter your preference, choose a high-quality product that can withstand foot traffic and vary your putting-game challenges.
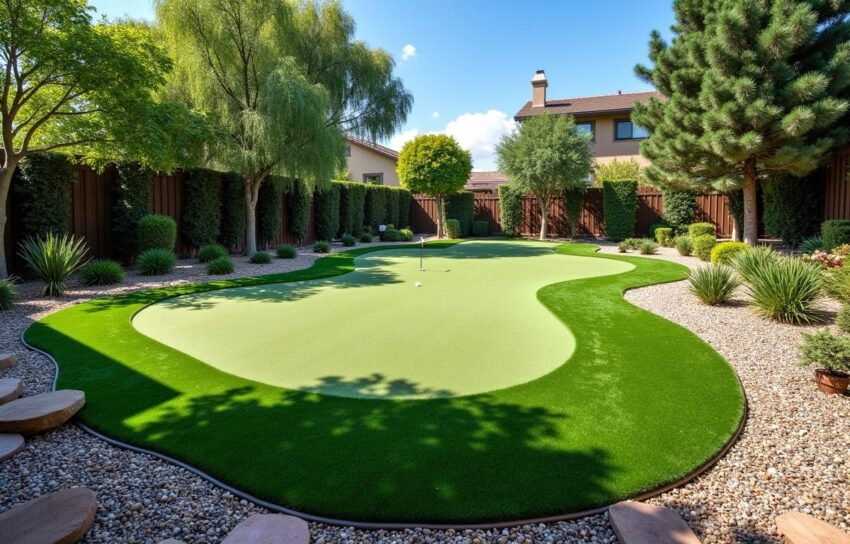
Backyard Putting Green Design Ideas
Shaping your putting surface offers a chance to get creative. You can incorporate small mounds or gentle slopes that replicate the undulations of a professional golf course. Experiment with curved edges or add a sand trap if you have space. Some people turn their green into a multi-purpose space by including a chipping area on one side and a seating spot nearby for spectators.
Your putting area shouldn’t just look nice—it should also play well. A small practice zone that captures the feel of a real green can encourage you to keep refining your short game. If you enjoy entertaining guests, think about adding decorative pathways or landscaping accents around the perimeter. That way, your green doubles as a recreation spot and an attractive backyard feature.
Cost of Building a Backyard Putting Green
Thinking about the total project expense is important before you commit. The cost of building a backyard putting green can vary widely based on size, materials, and the amount of labor required. Smaller, simpler designs tend to be cheaper, while larger or more intricate layouts will drive up your investment. You might also need to factor in the price of retaining walls, edging, and any ornamental elements you plan to install.
You’ll discover additional expenses if you hire a professional crew, though many homeowners cut costs through partial do-it-yourself approaches. When you tally up potential bills, don’t forget to include initial turf fees, gravel for the sub-base, and any accessories like cups, flags, or custom features. While it may seem significant at first, remember that your putting space is an investment that can provide years of enjoyment.
One key element you don’t want to overlook involves drainage considerations for putting greens. Without good water flow, your surface may develop puddles or suffer from damaging runoff. Proper slope and permeable layers will encourage rainwater to move away from the central playing zone, protecting your green from long-term issues.
Another aspect involves laying turf the right way so that seams are invisible and the roll remains smooth. Take your time aligning cuts and ensuring each piece of turf lines up correctly. Gaps or overlaps can hurt your ball’s path and spoil the overall appearance.
In some cases, you can borrow sports court surface prep tips to help ensure the ground beneath your putting green is evenly compacted. These approaches frequently involve removing debris, leveling the soil, and adding a high-quality barrier before laying your base material. By following these preparation steps, you increase the chance that your green will remain stable for years to come.
Ground Preparation and Installation Steps
Start the prep work by removing the top layer of grass or sod in your chosen location. You want a clean slate, so dig down a few inches and clear out roots or rocks that might hinder a neat installation. Then, tamp down or roll over the soil to create a level surface. If you plan to use a base material such as decomposed granite or crushed stone, spread it evenly and compact each layer thoroughly.
Installing the sub-base is critical for stability, especially if kids, pets, or friends will be walking about. Aim for at least three to four inches of well-compacted base material to prevent slumping and bumps.
This foundation also promotes better water flow, as you can incorporate backyard putting green drainage solutions when layering. A combination of sloped terrain and porous materials makes drainage more consistent, preventing water buildup that harms the turf.
Once your sub-base is smooth and thoroughly compacted, unroll your synthetic turf and position it carefully. Work in segments that align seamlessly. Use landscaping nails or staples, spaced every few inches along the edges to hold the turf in place.
Pay close attention to small wrinkles or bulges, smoothing them out as you go, so your practice shots aren’t disrupted by uneven ground. Finally, cut out holes for cups and insert flags or poles where you want your putting targets.
Maintaining and Enjoying Your Green
After finishing the installation, you’ll find that maintaining a backyard putting green depends largely on your choice of turf. If you opted for synthetic grass, upkeep typically involves brushing the surface and occasionally removing leaves or debris.
A light rinse with water may be enough to keep it looking fresh, though you’ll want to check any manufacturer instructions for specialized care. These small efforts help you preserve the feel of a clean, professional course.
If you prefer real grass, regular mowing, watering, and fertilizing become part of your routine. Scalp the grass a bit shorter in the actual putting area to keep the speed consistent. Think of your green as a miniature version of a pro course that needs frequent attention. By maintaining a backyard putting green properly, you’ll ensure it remains lush, attractive, and fun for golf practice.
Remember that ongoing improvements can breathe new life into your putting space. Over time, you might add alternate hole placements, embed painted markers, or reshape certain contours. Your backyard green can evolve along with your skills and personal style, offering a relaxing spot to sharpen your short game whenever the mood strikes.