It may seem daunting at first, but learning how to build a zipline in your backyard is a straightforward process that can turn your outdoor space into an exciting adventure zone. Many families want an exciting outdoor activity that keeps everyone entertained, and a backyard zipline fits the bill.
Before you dive in, you’ll need some planning skills, a little bit of the right gear, and a focus on safety. If you put in thoughtful effort, the finished result will give you years of exhilarating rides. Let’s walk through the key steps that will make your zipline plan a reality.
Contents
- 1 Getting Started with Your Zipline Setup
- 2 Choosing the Right Materials
- 3 Finding the Perfect Launch and Landing Points
- 4 Safety Tips You Shouldn’t Ignore
- 5 Step-by-Step Installation Process
- 6 Testing and Maintenance
- 7 Planning for Add-Ons and Landscaping
- 8 Handling Weight Limits and Costs
- 9 Exploring Additional Support Structures
- 10 Incorporating It into Your Yard’s Design
Getting Started with Your Zipline Setup
Begin by mapping out what you want from your new backyard thrill ride. Think about who will use it, how often, and the space you have available. An optimal zipline path offers decent length and a gentle slope, yet it shouldn’t stretch across areas where people frequently walk.
It’s also wise to consider neighbors and local regulations, as some communities may have guidelines regarding structures that cross property lines.
Assessing Your Environment
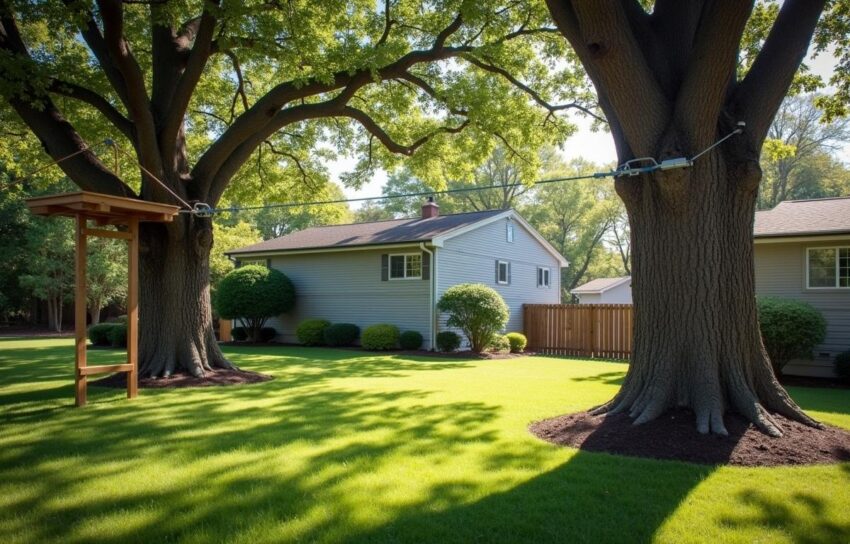
Look for solid anchor points, like mature trees with a strong trunk. Check your yard’s terrain to ensure you can create the correct angle for a smooth ride. If you don’t have natural anchors, you can install sturdy posts that extend well into the ground.
The key is to pick anchors that resist swaying or bending under tension. Also, measure the distance carefully, because your cable length will depend on how far apart these anchor points are.
Choosing the Right Materials
If you plan on a DIY zipline in backyard settings, you need a sturdy cable, suitable anchors, and reliable hardware. You can choose galvanized steel cable, which resists rust and holds up over time.
Thicker cables usually handle more weight, but be sure to cross-check your load requirements. Don’t forget the trolley or pulley system that slides along the line, as well as a fastening mechanism that attaches the rider’s harness to the trolley.
Securing Materials Needed for Backyard Zipline
Your shopping list typically includes cable clamps, turnbuckles, carabiners, and a harness. Cable clamps keep your cable securely in place, while turnbuckles let you adjust tension. Aim to buy these components from trusted retailers that specialize in outdoor gear.
By selecting parts meant for heavy loads, you ensure long-term stability. Double-check product ratings to confirm safe usage limits.
Finding the Perfect Launch and Landing Points
Decide where riders will start and finish their ride. Some homeowners like building a small platform at the launch site to get enough height.
Others let the rider climb easily accessible steps on a hillside. At the landing zone, you want clear space so riders can slow down gently. Trees, garden decorations, or fences can pose hazards, so keep the landing region free of obstacles.
Planning Slope and Tension
A zipline that’s too steep can send riders racing uncontrollably, while a zipline that’s too level may not give enough momentum. Aim for a gentle slope that ensures a fun, but safe pace. Too much slack in your cable can create bumpy rides, and too little slack can jerk riders upon launch. Experiment by adjusting turnbuckles until you find that sweet spot.
Safety Tips You Shouldn’t Ignore
Safety tips for building a zipline aren’t just a formality—they’re your lifeline for worry-free enjoyment. Make sure your riding gear has reliable harnesses, straps, and carabiners. Helmets aren’t optional for kids or adults, as impact hazards exist no matter how carefully you plan. Inspect your zipline before each ride to check for signs of wear or corrosion, especially around hardware.
Checking Backyard Zipline Safety Tips
If you’re unsure about cable load or secure anchor points, check backyard zipline safety tips provided by expert sources. They often highlight the importance of regular maintenance and safe riding practices. These pointers also cover rider weight restrictions and how to manage multiple riders in one day. When in doubt, consult a professional or err on the side of caution.
Step-by-Step Installation Process
Setting up your line can be straightforward if you follow each step carefully. While every yard is different, you’ll typically measure the distance between anchor points first. Then, install a strong cable at one end, either wrapping it around a tree or attaching it to a secure post.
Continue by threading the cable through the trolley or pulley, then anchor the other end with a turnbuckle. A quality zipline kit installation guide can help with product-specific steps.
Tuning the Cable Tension
Keep a close eye on tension as you tighten your turnbuckle. Some homeowners over-tighten the cable, which can lead to extreme stress on trees or posts. On the other hand, too much slack will hinder the ride or leave riders dragging on the ground. Strike a balance that delivers a smooth, quick glide without an abrupt stop. Periodically recheck tension over time as cables can stretch with repeated use.
Testing and Maintenance
Test the zipline with a weighted bag before any person hops on. Use sandbags or a durable sack to mimic the average rider’s weight. Watch how the bag travels the line, observing if it clears the ground and stops safely.
If everything looks good, you can do a short ride at half-speed before letting the full family try it out. Maintenance becomes a regular task, as you should tighten hardware, look for wear, and monitor tree health if you used living anchors.
Keeping Your Zipline in Top Condition
You’ll want to oil the trolley bearings if they start squeaking and replace cables that show visible signs of damage. Accidents can happen if you neglect even a small fray or worn-out clamp. By staying vigilant, you prevent unexpected mishaps and keep your zipline operating smoothly. This level of care ensures your investment continues to reward you with endless fun.
Planning for Add-Ons and Landscaping
Midway through construction, you might think about some landscaping or minor yard improvements. If you’re integrating a zipline into a family-friendly space, look into safe playground planning basics. That phrase underscores the importance of removing sharp objects or obstacles near the zipline path.
Setting up soft ground cover in case someone stumbles is another good measure. While you’re at it, add a small seating area so observers can watch riders zip by in comfort.
Enhancing the Ground Below
One often overlooked detail is maintaining proper drainage underneath where the zipline will operate. Standing water can cause muddy landings or slippery takeoffs, and it can weaken wood posts if water seeps in. Keep an eye out for puddles or any soggy patches that might form after rain. Some people install gravel or perforated tiles to help with water flow around the launch and landing areas.
Handling Weight Limits and Costs
You’ll probably have questions on cost of building a backyard zipline before you begin. Basic setups can be affordable if you already have hefty anchor points like reinforced posts. Complex builds, or long lines with high-grade hardware, will raise your budget.
Labor costs add up if you’re hiring professionals. But either way, you’re investing in an entertaining structure that boosts the fun factor in your yard.
Monitoring Capacity for Riders
Many zipline kits recommend specific backyard zipline weight limits. Pay close attention to those figures to keep riders safe. If heavier participants want to try, consider upgrading to thicker cable or bigger hardware. Always follow the manufacturer’s guidelines and don’t push the equipment beyond its tested capacity. It’s better to err on the side of caution than risk damage or injury.
Exploring Additional Support Structures
Some backyards lack the right trees or surfaces to anchor cables. In that case, you can create sturdy sports court footings. This phrase means constructing robust concrete footings or metal frames similar to those found under outdoor courts. They handle tension well over time, so you won’t worry about your posts bending. Hiring a contractor with experience in similar projects might be worth the extra cost if you want full peace of mind.
Best Materials for DIY Zipline
When setting up your structure, you might hear about the best materials for DIY zipline use, such as galvanized steel cables and weather-resistant hardware. These components reduce the risk of rust and stand up to consistent tension from riders. Stainless steel can also be an option if you live in a humid environment. No matter the material, regular upkeep ensures your zipline remains sturdy and safe.
Incorporating It into Your Yard’s Design
With your line up, you can make it blend seamlessly into your backyard. Plant low-maintenance shrubs around the anchors, or add decorative fencing near the landing area. By incorporating the zipline as part of a broader outdoor setup, you create a cohesive look and feel. Parents might add a small swing set or build a treehouse platform. If you do, keep the entire yard in mind so elements don’t clash or interfere with each other.
Long-Term Fun
Once your zipline is good to go, encourage everyone to partake but keep safety front and center. Involve friends and family by letting them watch initial test runs or take photos during special events. Kids often share these memorable adventures with classmates, making your backyard the go-to spot for birthday celebrations. These moments create a sense of community and fun that will never grow old.
Maintaining your zipline requires regular inspections and minor adjustments. Keep your cable free from rust, retighten clips if needed, and watch your anchor points for signs of wear. Over time, you can enhance the area with extra seating, small lights, or even protective barriers. Whether you built it for family activities or you’re simply an adrenaline buff, a backyard zipline can transform normal weekends into mini adventures.