Initially, you might think how to lay turf in backyard is a complex task. Yet, once you sort out your soil and gather the right tools, the process becomes straightforward. The key is to plan each step, from preparing the ground to watering correctly. Many homeowners discover that installers can be pricey, so a do-it-yourself approach often saves money.
Opting to do the job yourself offers valuable control over the appearance of your lawn. You decide on the soil mix, the health of each grass roll, and the final shape of your yard. This freedom gives you a sense of pride in the final result. By handling the installation personally, you also develop an understanding of how your new turf works with the local climate.
Contents
- 1 Preparing Soil for Turf Installation
- 2 Best Grass Type for Turf
- 3 Tools for a Smooth Turf Project
- 4 Laying the Turf Step by Step
- 5 Avoiding Water Buildup and Drainage Woes
- 6 Maintenance and How to Care for Newly Laid Turf
- 7 Keeping an Eye on Costs and Budget
- 8 Handling Wear and Tear
- 9 Troubleshooting Odd Spots
- 10 Additional Tips for a Vibrant Lawn
- 11 Enjoying a Freshly Transformed Yard
Preparing Soil for Turf Installation
Before any grass arrives, it’s crucial to create a healthy base. If you jump right into laying sod without clearing debris or leveling the ground, you run the risk of an uneven lawn. Proper soil prep helps roots spread and develop strong growth. This step usually involves raking, removing old vegetation, and adding topsoil.
Consider testing your soil pH if your region has known acidity or alkalinity issues. Achieving a balanced pH means your turf gets the nutrients it needs. Adding compost is another beneficial move, as it enriches the soil and improves its ability to hold water. Improving ground quality is often the first step in matching advice on how to prepare soil for turf.
Best Grass Type for Turf
Many people wonder which variety of grass will thrive under local weather conditions. The best grass type for turf installation depends on foot traffic, sunlight, and your climate’s temperature range.
Warm-season grasses like Bermuda or Zoysia prefer hotter areas, while cool-season grasses such as Rye or Fescue handle cold climates well. In very hot regions with moderate foot traffic, Bermuda grass often shines. On the other hand, Fescue stays green for longer periods in milder zones.
Visiting local nurseries or talking to neighbors who have installed sod can guide your choice. Some homeowners also prioritize the color of the grass, selecting deeper green shades for aesthetic reasons. If you’re still unsure, consider a small test patch of two different grass rolls to see which takes root more effectively.
Balancing Sun and Shade
Your yard’s sunlight exposure can be the deciding factor. Some areas stay in shade most of the day, while others see direct sunlight for hours. Shadier areas often do best with a turf variety designed to handle low light, such as certain Fescue blends. Sun-loving grasses can turn patchy in high-shade sections without additional care.
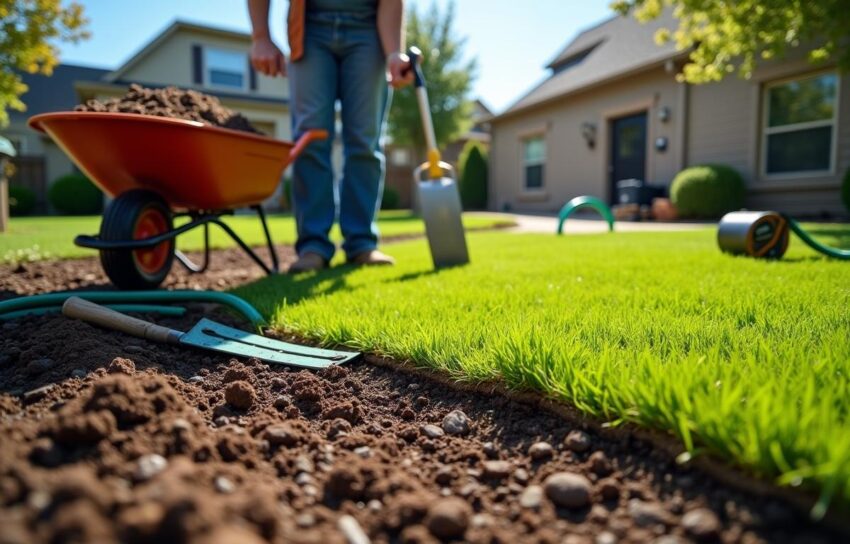
Tools for a Smooth Turf Project
Gathering the right equipment from the start makes the job much easier. Tools needed for laying turf often include a sod knife, garden rake, wheelbarrow, and measuring tape. If you have a larger backyard, renting a sod roller can be extremely useful to help the grass roots make solid contact with the soil. Even a simple garden hose with a spray nozzle can make watering more precise.
Plan where you will place the sod pallets to reduce extra hauling. You don’t want to wear yourself out by moving turf rolls excessively. Having everything ready, from the fertilizer to your rake, ensures you can lay the sod in one go, which helps avoid uneven seams or drying edges. These careful steps are part of a step-by-step guide to laying turf.
Checking Your Irrigation System
Before any grass touches the ground, confirm your sprinklers or hoses can water all parts of the yard evenly. Spotty irrigation coverage leads to dry corners or patchy growth. If installing new sprinklers, do so before you lay the sod to avoid trampling or damaging your fresh turf. An even water supply is essential for stable root growth, especially in the first few weeks.
Laying the Turf Step by Step
Clearing the area and leveling your soil sets the stage. Once your turf arrives, try to install it as soon as possible. Begin by laying the first strip along a straight edge like a fence or walkway. Gently push each roll against its neighbor so the seams meet snugly without overlapping. Staggering your seams in a brickwork pattern helps the lawn look more natural.
When you get to corners, cut the sod carefully with a sod knife. Wait until you’ve completed an entire row before you knock out any corners. Take care not to stretch the sod; forcefully pulling it can rip roots or create air pockets. Part of solving muddy backyard problems is ensuring each piece fits well so proper drainage can occur underneath.
Even with good leveling, some low spots may appear. Fill these with a bit of topsoil before placing the turf. Occasionally step back to survey your work and confirm the pieces lie flat. Patting down each strip helps the roots settle into the ground. After finishing a sizable section, water lightly to keep the sod from drying out while you continue installing.
Avoiding Water Buildup and Drainage Woes
Excess water beneath your new turf can lead to rotting roots or fungal issues. Drainage fixes for lawns may involve creating a slight slope away from your home or placing a drainage system to channel water. If your yard struggles with puddles, you might need to add a sheet of gravel beneath the soil layer.
Occasional aeration down the road promotes efficient water flow, but it’s not recommended right after installation. A well-structured ground not only helps cost of backyard turf installation remain lower—since you won’t need expensive repairs—but also ensures fewer surprises during heavy rains. Planning drainage in the early stages keeps your investment safe.
Maintenance and How to Care for Newly Laid Turf
Knowing how to care for newly laid turf makes the difference between lush green grass and a brown, patchy mess. In its first couple of weeks, fresh sod demands consistent watering. Aim to keep the soil moist but not puddled. Most new lawns benefit from watering in the morning and late afternoon to combat evaporation, though your local climate may call for tweaks to this schedule.
After about ten days, you can gently check if the roots have started to attach by lifting a corner of a turf piece. If the sod offers resistance, that signals strong root growth. Once those roots strengthen, adjust your watering frequency to encourage deep root development. Over-watering can hinder the turf from growing robust roots because it remains too reliant on surface moisture.
Timing First Mow and Fertilization
Be sure to wait until the roots have a good hold before mowing. This usually takes around two to three weeks. If you mow too early, you risk unsettling the sod and causing bare patches. Set your mower to a higher cut for the initial trims to minimize stress on the young roots.
On the fertilizer front, a light feeding is beneficial after the sod establishes. Select a balanced fertilizer geared toward new lawns. Avoid heavy applications right away, as too many nutrients can lead to rapid blade growth without stable root support. Employing the best turf types for backyard care patterns will help your grass stay vibrant.
Keeping an Eye on Costs and Budget
Many factors influence the cost of backyard turf installation, such as yard size, grass type, and added services like soil testing. If you’re on a tight budget, doing it yourself is often the more affordable route. You’ll still pay for sod rolls, soil amendments, and any needed rental equipment, but you’ll save on labor.
Look for seasonal deals or special promotions at local garden centers. Sometimes, purchasing at the end of a growing season leads to reduced prices. However, always check the quality of the rolls. Cheap or old sod can bring disease and take longer to root, which might offset what you save initially.
Long-Term Savings
A well-installed lawn cuts down on hassles and costs. Proper soil prep and correct watering routines reduce the risk of large repair bills later on. Regular upkeep, like fertilizer applications and weed control, also preserves the yard’s condition. Over time, you’ll see that investing in good prep and healthy rolls pays off.
Handling Wear and Tear
Backyard turf endures foot traffic, barbecues, and pets. Heavy activity, such as kids running and playing ball, compresses the soil. Occasional aeration helps restore air pockets, promoting root growth. If parts of the lawn thin out, overseed these areas to keep the grass thick.
Regular inspections help you catch pests before they spread. Watch out for discolored patches or murmuring insects in the soil. Prompt action with natural or commercial treatments usually solves these minor issues.
Troubleshooting Odd Spots
Early detection of problem areas keeps bigger headaches away. Yellowing strips can indicate insufficient watering, while spongy patches might suggest too much moisture. Sometimes, your local garden extension office can test suspicious areas for fungus or pests.
If you notice dips or small holes, fill them with a topsoil mix and re-seed. Bald spots might require a small piece of new sod, especially if the grass type is not easily reseeded. Don’t let small imperfections grow into major problems.
Balancing Lawn and Garden
If you have flower beds near your turf, consider putting a small barrier in place. It keeps soil and mulch from spilling onto your grass. Likewise, avoid letting mower clippings pile up in garden beds. A clear divide between lawn and beds helps everything look tidier and protects younger plants.
Additional Tips for a Vibrant Lawn
Regular watering and occasional fertilizing are only part of the story. Good airflow around your grass prevents mold or mildew, especially in damp climates. Installing pathways or stepping stones in high-traffic spots can spare your turf from constant compression. It’s better to plan walkways during installation, but you can also add them later with minimal disruption.
Occasionally, you’ll need to dethatch the lawn. Thatch is the layer of dead grass between the soil and living blades. A light dethatching ensures seeds, water, and nutrients easily reach the roots. Keeping a tidy lawn extends its life and lowers future repair costs.
Enjoying a Freshly Transformed Yard
Seeing your backyard transform from dirt to a lush oasis is incredibly gratifying. The personal touch you add by selecting the grass type and shaping the layout gives your space character. You also learn practical skills about your lawn’s needs, from how to water efficiently to regulating mowing heights.
Once established, your new turf welcomes outdoor gatherings, playful pets, and a relaxing spot to decompress. The entire experience lets you appreciate nature’s resilience as your turf adapts and flourishes. With a bit of regular attention, that fresh green carpet will remain healthy for years to come.